


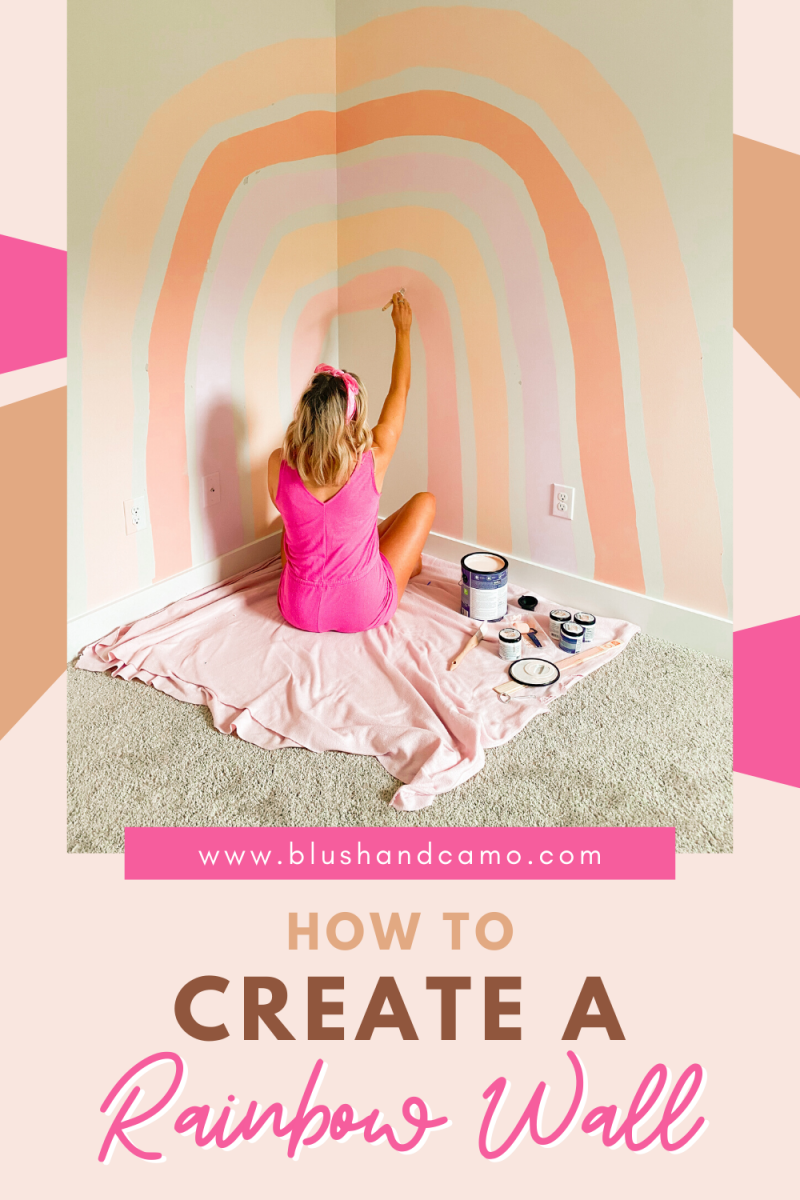

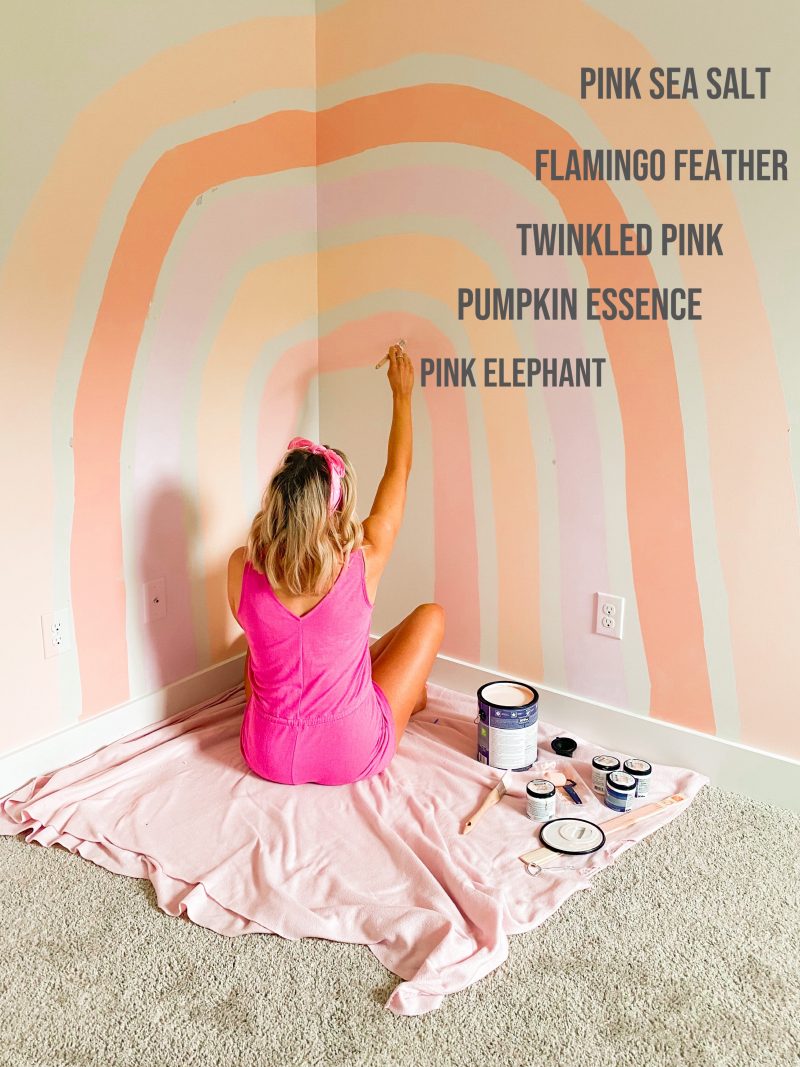
Welcome back to Blush & Camo! Today I’m sharing how to create a rainbow wall. I’m currently in my third trimester and getting my nursery ready for Baby C to arrive in August!
Her nursery theme is boho inspired with lots of rainbows and unicorns. I knew I wanted a boho rainbow as the focal point of the nursery, but the wall paper and rainbow decals were super expensive! The one that inspired this entire wall can be found here. But it’s $439 so I decided to create my own!
Here is my step by step process for creating your very own rainbow wall! This would look amazing in any nursery (for a boy you could switch up the colors!) or little kids room.
Let’s dive into it!
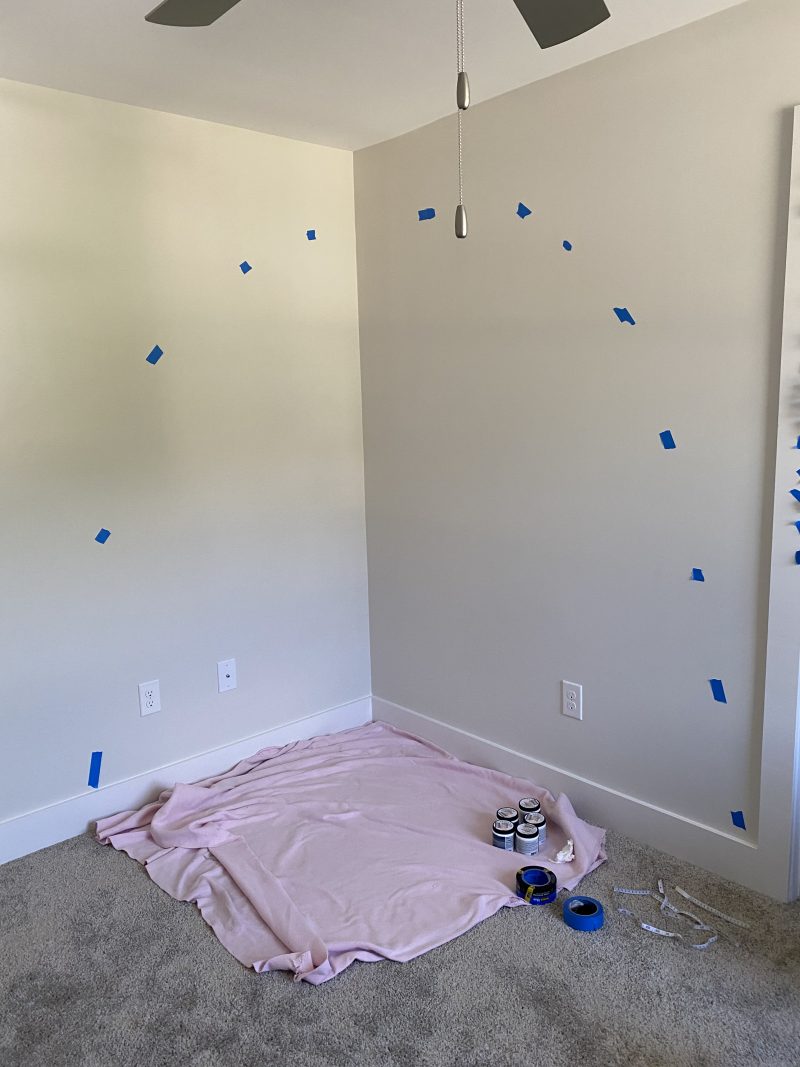
CREATE YOUR OUTLINE:
First, you want to determine how large you want your rainbow. So, you’re going to start by creating your outer most arch first!
I did this by using small pieces of blue paint tape. I didn’t want the rainbow to look perfect so I eyeballed the shape to how I wanted it to look. This process took me over an hour because I wanted the arch to look perfectly imperfect! All your other rainbow arches are going to be based off of your first one, so I wanted to spend the most time on this!
Then, I filled in the outer most arch with painters tape. I found it easier to make small cuts in the tape to bend it how I wanted to when creating my arch. I also got sick of doing this and used small pieces of tape overlapping one another to create my arches.
MEASURE OUT YOUR OTHER ARCHES
After my first arch was created I wanted to measure out the rest of the arches to ensure they were all equal thickness and distance apart.
For my rainbow I made each arch 8 inches thick and two inches apart. I used a tape measure and blue paint to mark the thickness and distance of each arch.
In total I have five arches on my rainbow!
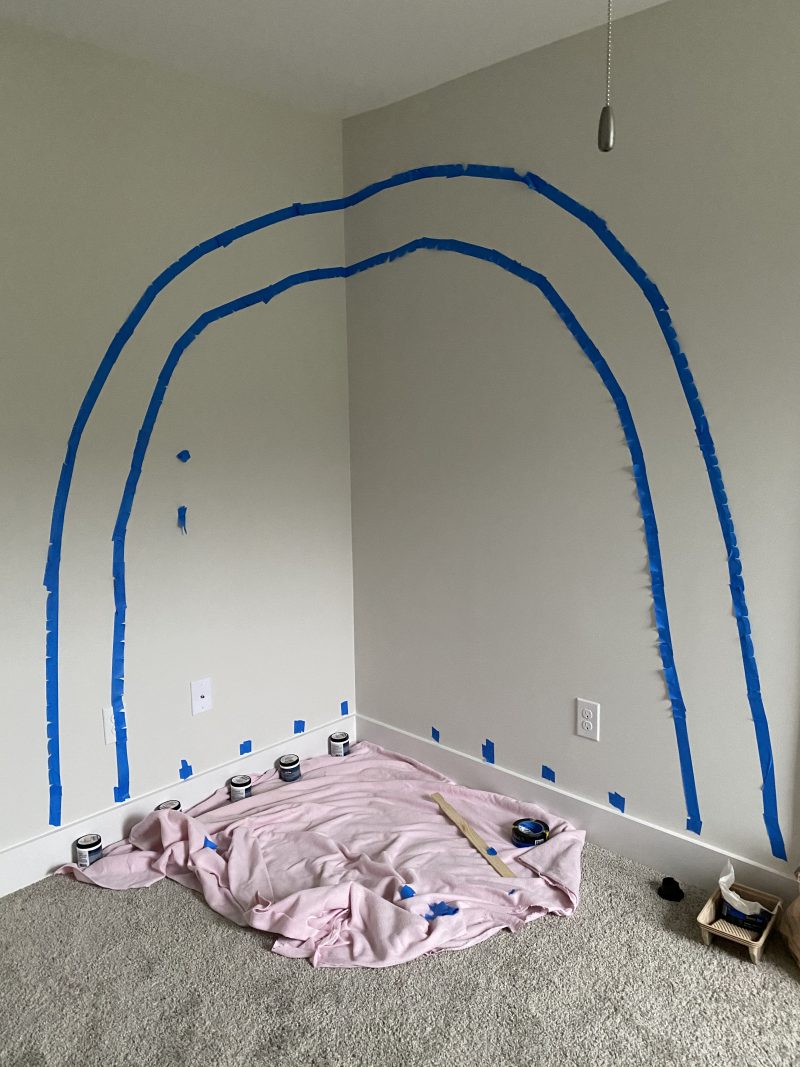
TAPE THE OUTLINE TO THE REST OF YOUR ARCHES
The good news is, you’ve done all the hard leg work upfront! Now, it’s time to create the rest of your arches with painters tape.
I found it easier to outline one arch, paint it in, then move to the next arch so I could visually see how the rainbow was turning out. Using this method I could tweak arches or add a little more paint to ensure the rainbow was exactly how I wanted it to look!
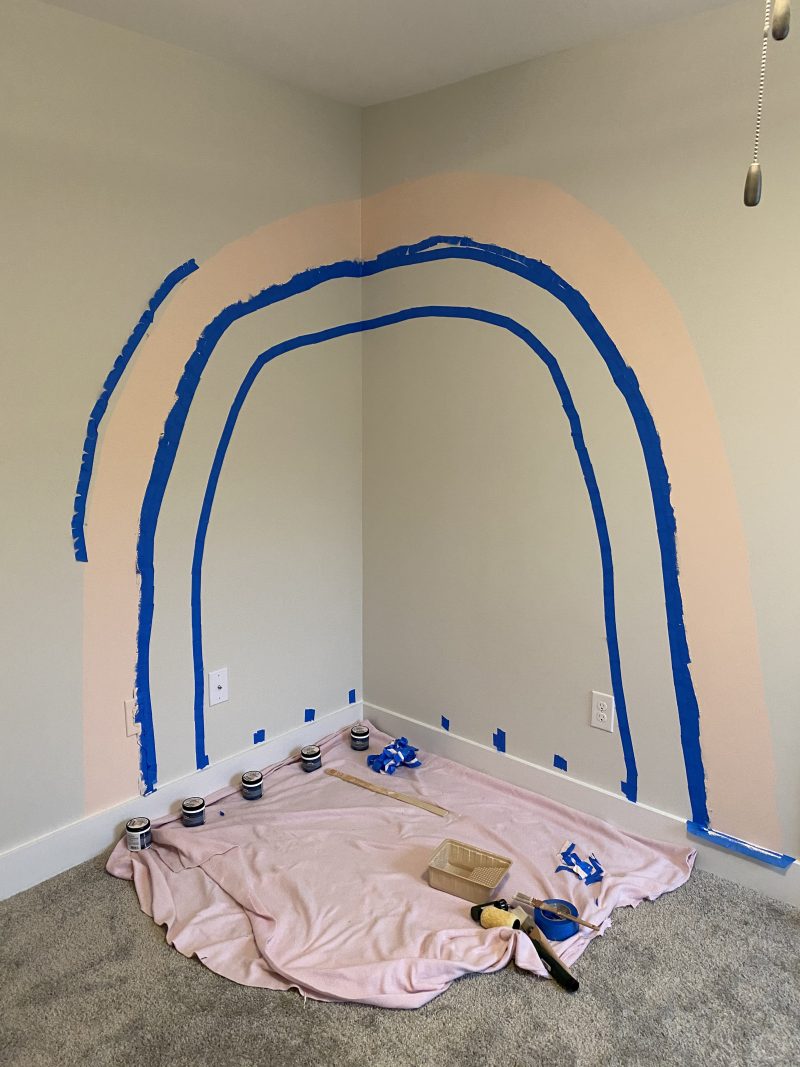
PAINT YOUR ARCHES
Now the fun part! Time to start painting. I used a 6in roller brush to fill in each of the arches and a 2 in roller brush for additional detail work. Using a roller brushes gave a flawless finish the rainbow and took way less time than a brush.
Below are all the Behr paint colors we used if you want to replicate this exact color scheme!
TAKE OFF PAINTERS TAPE & FINE TUNE
Once the paint dries on all your arches it’s time to take off the painters tape! When I did this I noticed a few spots that needed additional paint so I went in with a 1 inch paint brush for this detail work.
That’s it! Those are all the steps you need to create your very own boho inspired rainbow wall!
Leave me any questions about this DIY project below!
Thank you for stopping by Blush & Camo!
You can follow me on Pinterest by clicking here!
Get more daily inspo by following me on Instagram and TikTok!
xx, Julianna


Hi!! So im acTuallY making mY own rainbow for mY babies nursery as we sPeak. Are the lines between each arch sPecifically two Inches aPart? I Noticed you used a Couple lines of tape next to eachother To MAke the sPace a little bigger but i cant tell. If that addEd up to two inches or more than two Inches?
Were You able to get away with sample sizes for eAch of the colors?