


Welcome back to Blush & Camo! I’m super excited for today’s post because today I’m sharing all the details of how Chuck and I refurbished a dining room set we found on Facebook Marketplace for under $200!
In this post I’ll share how to best shop Facebook Marketplace, the tools we used for this project, and the step by step process for how we completed this dining room set! I hope this post helps and inspires you to makeover your own furniture.
TOOLS YOU WILL NEED

- DeWALT 3 Amp Corded 5 in. Variable Speed Random Orbital Sander
- 5 in. 80-Grit Universal Hole Random Orbital Sanding Disc with Hook and Lock Backing (50-Pack)
- 1 qt. #YL-W14 Off White Satin Enamel Interior Paint and Primer in One
- Varathane 1 qt. Clear Matte Water-Based Interior Polyurethane
- 2-1/2 in. Pro Nylon/Polyester Thin Angle Sash Brush
- 1-1/2 in. Pro Nylon/Polyester Thin Angle Sash Brush
- WATCO 1 pt. Natural Danish Oil
- 10 in. x 15 in. EcoSoft Rags (45-Pack)
These are all of the tools Chuck and I used during this project! I even linked the exact color of paint we used for the chairs and base of the table. We went with a Behr paint in the color “Off-White” in a satin finish.
HOW TO SHOP FACEBOOK MARKETPLACE
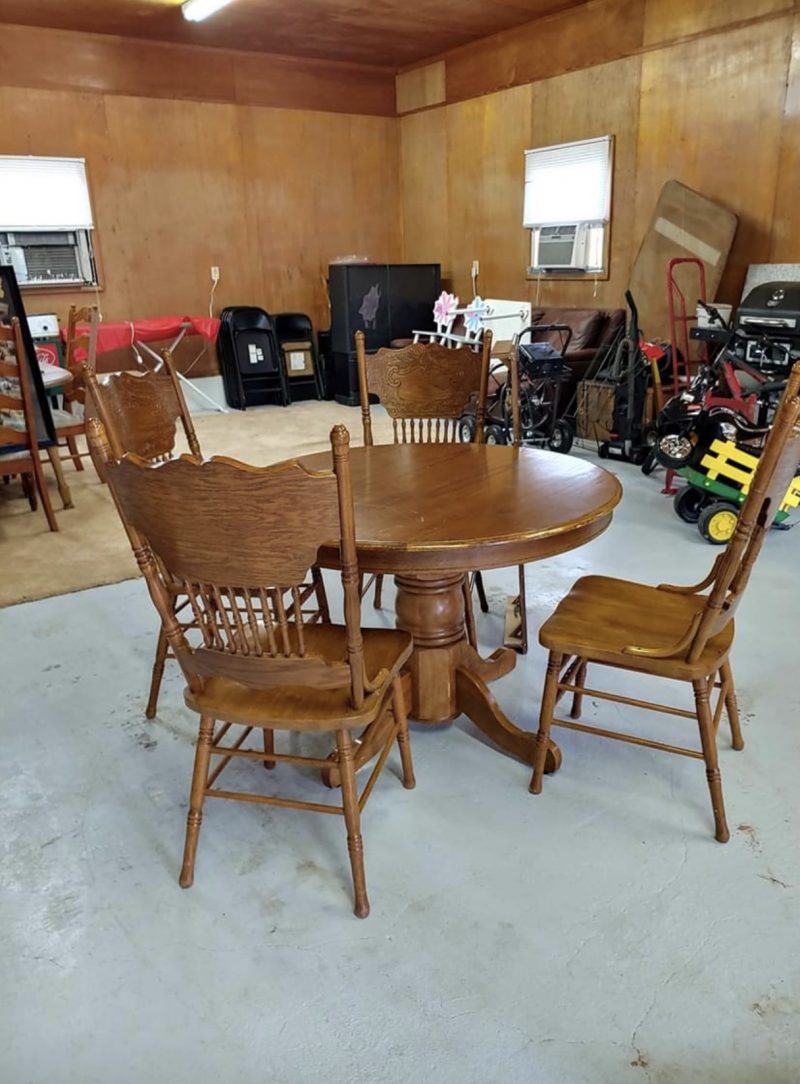
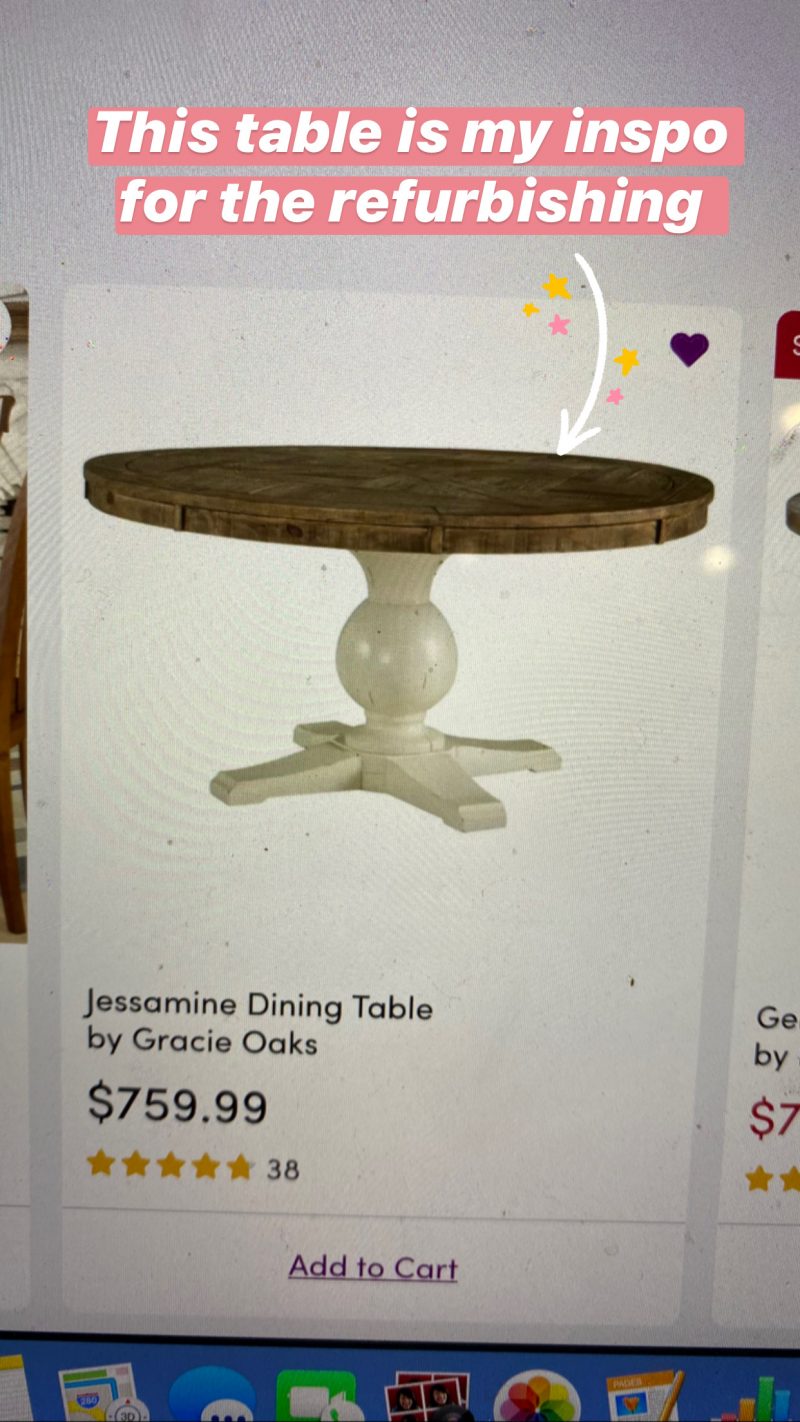
We got this dining room set from Facebook Marketplace and this platform is a goldmine of finding furniture items to refurbish at an affordable price. I’ve always wanted a round, farmhouse table but didn’t want to pay the price tag for one.
So, I went on Facebook Marketplace and looked for round tables within a 75 mile radius of where I live. There were actually a lot of options to pick from. I ultimately choose this table because of the detailing on the chairs and the beautiful detailing on the base of the table.
If you are looking to shop Facebook Marketplace I recommend starting with a broad search of the item you are looking for and narrowing it down from there. For example, if you are looking for a rug I would search “area rug” and see everything that is available in your area.
Keep in mind that when people upload their items to Facebook Marketplace they are not savvy in SEO and usually aren’t getting specific with their item. They are writing the most broad, obvious version of what they are selling.
Search words that are broad such as area rug, dining room set, etc will give you a feel for everything available in your area and see if there trending words on products where you can narrow your search!
I’ve purchased so many items from Facebook Marketplace and found that this platform is the best if you are looking for these categories:
- Rugs
- Dining Room sets
- Barstools
- Home Decor
- Chairs
- Outdoor furniture
HOW TO MAKEOVER A DINING ROOM SET
Now that you know how to shop Facebook Marketplace to shop for your next furniture makeover it’s time to dive into how to actually turn your purchase from drab to fab!
Chuck and I got this dining room set for under $200 and I knew right away that I wanted to makeover this set into my dream modern farmhouse dining room set.
The chairs had beautiful detailing on the backs of them so we decided not to sand the chairs prior to painting.
We gave each of the chairs three coats of our Behr paint each using the paint brushes I linked above. I really wanted the chairs a pure white so that’s why we went with three coats. Then, we sealed the bottom of the chairs (the part where you sit on the chair) with three coats of matte clear polyurethane.
If you are looking to create a more rustic farmhouse aesthetic I recommend only giving your furniture 1-2 coats of paint to allow some of the wood to show through. This gives your furniture a more “worn-in” look!
In order to get into all the cracks on the detailing of the chairs I would dip my paint brush into the paint and then stamp the paint brush into the crevices on all the details. Then, I went through a made smooth brush strokes to even out the paint.
Chuck and I decided not to sand the base or legs of the table because I wanted them to match the color of the chairs. We also didn’t sand the base or legs of the table. We also gave three coats of paint to the base of the table.
SANDING THE TABLE
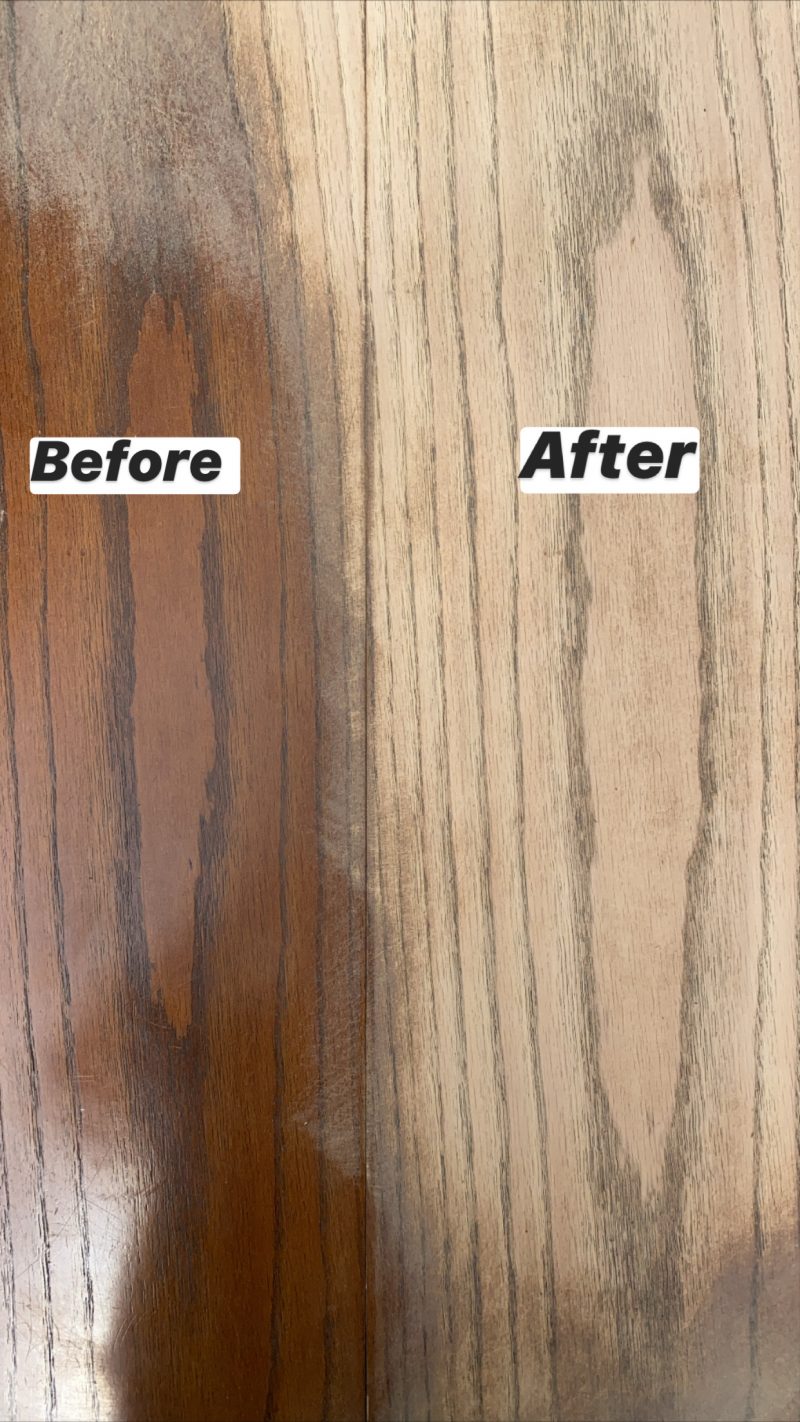
The last step to refurbishing our dining room set was the sand the top and lip of the table. We did some research on sanders and opted for the DeWalt sander linked above because it was a great price for the features that came with it!
We also decided to sand with 80 grit discs. A good rule of thumb with sanding is the lower the number (60, 70, 800 grit sand paper) the bigger the grit. The bigger the grit the easier it is to take off the finish on the furniture you are making over.
The higher the number (120, 220, 240) the smaller the grit and this sand paper isn’t actually going to remove the finish off of furniture. This sandpaper is simply going to smooth out the wood on your furniture.
It took about 4 sheets of sandpaper and a full hour to sand the entire top and lip of our table.
We found out after sanding the table that we had an oak table which I was super excited about!
HOW TO PICK THE RIGHT STAIN & APPLY
Once the table was sanded Chuck and I decided to stain our table with danish oil. Danish oil is a hard drying oil, meaning it can polymerize into a solid form when it reacts with oxygen in the atmosphere. It can provide a hard-wearing, often water-resistant satin finish, or serve as a primer on bare wood before applying paint or varnish.
Chuck and I wanted to keep the wood on top of the table as natural as possible since the oak was gorgeous. We also loved that danish oil is a stain and sealer in one so this saved us some time.
TO APPLY:
- Ensure you clean off the wood you are about to stain with a damp rag and let the wood dry
- For your FIRST coat of danish oil coat on with a paint brush and use a generous amount. Then, right after staining use a dry rag and brush off any excess stain using a clean, dry rag
- After two hours use a rag to apply your second coat of danish oil. Then, right after staining go in again with a clean, dry rag and wipe off any excess.
- Then, eight or more hours after your second coat use a rag to apply a light third layer of stain. Then, right after staining go in again with a clean, dry rag and wipe off any excess.
Chuck and I only did three coats because we didn’t want the table to look shiny. The more coats you use the shinier the wood will appear. Three coats is the minimum number of coats to properly stain and seal your surface.
HOW TO DISPOSE OF YOUR STAINING RAGS
While doing our research on wood stain we found out that danish oil is highly flammable.
If you do decide to go with danish oil to stain your wood you should put all of your stained rags outside on your drive way (NOT on top on one another, but spread out) and let them dry out. Once they are dried out you put them in a bucket of water and let soak. Then, you can throw your rags in the trash.
FINAL RESULT
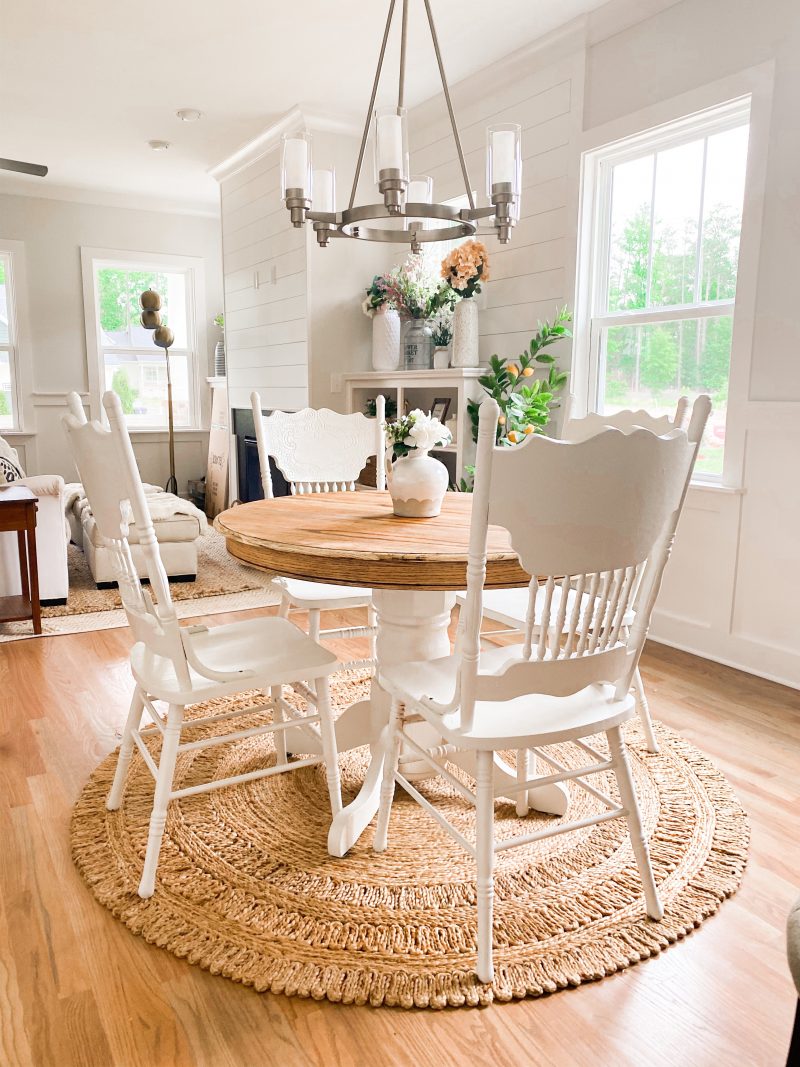

We are so happy with the final result of our modern farmhouse table! What do you think?! Let me know below!
Thank you for stopping by Blush & Camo!
You can follow me on Pinterest by clicking here!
Get more daily inspo by following me on Instagram and TikTok!
xx, Julianna


Leave a comment